Image Viewer Dengan Blue Java Versi 1.0
Nama : Isnaini Nurul KurniaSari
NRP : 05111740000010
Kelas : PBO-B
Tugas Pemrograman Berbasis Objek (PBO)
Membuat Image Viewer Dengan Bluej Versi 1.0
Pada postingan kali ini, saya membuat Image Viewer versi 1.0 dengan GUI (Graphical User Interface). GUI merupakan desain aplikasi dengan tampilan visual sehingga pengguna dapat dengan mudah menggunakan aplikasi. Berikut class dan source code untuk membuat Image Viewer dengan GUI. Source code di bawah ini merupakan implementasi dari source yang ada di buku:
Class yang dibutuhkan untuk membuat Pemrograman Image Viewer dengan Blue J versi 1.0 adalah:
1. Class ImageViewer
2. Class ImagePanel
3. Class ImageFileManager
4. Class OFImage
Berikut ini adalah source code untuk Class ImageViewer:
/**
  * Write a description of class ImageViewer here.
  *
  * @author Isnaini Nurul KurniaSari/05111740000010
  * @version 1.0/26-11-2018
  * @class PBO-B
  */
 import java.awt.*;
 import java.awt.event.*;
 import javax.swing.*;
 public class ImageViewer
 {
   private JFrame frame;
   private ImagePanel imagePanel;
   /**
    * Create an ImageViewer show it on screen.
    */
   public ImageViewer()
   {
     makeFrame();
   }
   // ---- implementation of menu functions ----
   /**
    * Open function: open a file chooser to select a new image file.
    */
   private void openFile()
   {
     OFImage image = ImageFileManager.getImage();
     imagePanel.setImage(image);
     frame.pack();
   }
   /**
    * Quit function: quit the application.
    */
   private void quit()
   {
     System.exit(0);
   }
   // ---- swing stuff to build the frame and all its components ----
   /**
    * Create the Swing frame and its content.
    */
   private void makeFrame()
   {
     frame = new JFrame("ImageViewer");
     makeMenuBar(frame);
     Container contentPane = frame.getContentPane();
     imagePanel = new ImagePanel();
     contentPane.add(imagePanel);
     // building is done - arrange the components and show
     frame.pack();
     frame.setVisible(true);
   }
   /**
    * Create the main frame's menu bar.
    * @param frame  The frame that the menu bar should be added to.
    */
   private void makeMenuBar(JFrame frame)
   {
     final int SHORTCUT_MASK =
       Toolkit.getDefaultToolkit().getMenuShortcutKeyMask();
     JMenuBar menubar = new JMenuBar();
     frame.setJMenuBar(menubar);
     // create the File manu
     JMenu fileMenu = new JMenu("File");
     menubar.add(fileMenu);
     JMenuItem openItem = new JMenuItem("Open");
       openItem.setAccelerator(KeyStroke.getKeyStroke(KeyEvent.VK_O, SHORTCUT_MASK));
       openItem.addActionListener(new ActionListener() {
                 public void actionPerformed(ActionEvent e) { openFile(); }
               });
     fileMenu.add(openItem);
     JMenuItem quitItem = new JMenuItem("Quit");
       quitItem.setAccelerator(KeyStroke.getKeyStroke(KeyEvent.VK_Q, SHORTCUT_MASK));
       quitItem.addActionListener(new ActionListener() {
           public void actionPerformed(ActionEvent e) { quit(); }
       });
     fileMenu.add(quitItem);
   }
 }
Berikut ini adalah source code untuk Class ImagePanel:
/**
  * Write a description of class ImagePanel here.
  *
  * @author Isnaini Nurul KurniaSari/05111740000010
  * @version 1.0/26-11-2018
  * @class PBO-B
  */
 import java.awt.*;
 import javax.swing.*;
 import java.awt.image.*;
 public class ImagePanel extends JComponent
 {
   // The current width and height of this panel
   private int width, height;
   // An internal image buffer that is used for painting. For
   // actual display, this image buffer is then copied to screen.
   private OFImage panelImage;
   /**
    * Create a new, empty ImagePanel.
    */
   public ImagePanel()
   {
     width = 360;  // arbitrary size for empty panel
     height = 240;
     panelImage = null;
   }
   /**
    * Set the image that this panel should show.
    *
    * @param image The image to be displayed.
    */
   public void setImage(OFImage image)
   {
     if(image != null) {
       width = image.getWidth();
       height = image.getHeight();
       panelImage = image;
       repaint();
     }
   }
   /**
    * Clear the image on this panel.
    */
   public void clearImage()
   {
     Graphics imageGraphics = panelImage.getGraphics();
     imageGraphics.setColor(Color.LIGHT_GRAY);
     imageGraphics.fillRect(0, 0, width, height);
     repaint();
   }
   // The following methods are redefinitions of methods
   // inherited from superclasses.
   /**
    * Tell the layout manager how big we would like to be.
    * (This method gets called by layout managers for placing
    * the components.)
    *
    * @return The preferred dimension for this component.
    */
   public Dimension getPreferredSize()
   {
     return new Dimension(width, height);
   }
   /**
    * This component needs to be redisplayed. Copy the internal image
    * to screen. (This method gets called by the Swing screen painter
    * every time it want this component displayed.)
    *
    * @param g The graphics context that can be used to draw on this component.
    */
   public void paintComponent(Graphics g)
   {
     Dimension size = getSize();
     g.clearRect(0, 0, size.width, size.height);
     if(panelImage != null) {
       g.drawImage(panelImage, 0, 0, null);
     }
   }
 }
Berikut ini adalah source code untuk Class ImageFileManager:
/**
  * Write a description of class ImageFileManager here.
  *
  * @author Isnaini Nurul KurniaSari/05111740000010
  * @version 1.0/26-11-2018
  * @class PBO-B
  */
 import java.awt.image.*;
 import javax.imageio.*;
 import javax.swing.*;
 import java.io.*;
 public class ImageFileManager
 {
   // A constant for the image format that this writer uses for writing.
   // Available formats are "jpg" and "png".
   private static final String IMAGE_FORMAT = "jpg";
   private static JFileChooser fileChooser = new JFileChooser(System.getProperty("user.dir"));
   /**
    * Open a file chooser and let the user select an image file in the file
    * system. Then read an image file from disk and return it as an image. This method
    * can read JPG and PNG file formats. In case of any problem (e.g the file does
    * not exist, is in an undecodable format, or any other read error) this method
    * returns null.
    *
    * @return    The image object or null is it was not a valid image file.
    */
   public static OFImage getImage()
   {
     int returnVal = fileChooser.showOpenDialog(null);
     if(returnVal != JFileChooser.APPROVE_OPTION) {
       return null; // cancelled
     }
     File selectedFile = fileChooser.getSelectedFile();
     return loadImage(selectedFile);
   }
   /**
    * Read an image file from disk and return it as a BufferedImage. This method
    * can read JPG and PNG file formats. In case of any problem (e.g the file does
    * not exist, is in an undecodable format, or any other read error) this method
    * returns null.
    *
    * @param imageFile The image file to be loaded.
    * @return      The image object or null is it was not a valid image file.
    */
   public static OFImage loadImage(File imageFile)
   {
     try {
       BufferedImage image = ImageIO.read(imageFile);
       if(image == null || (image.getWidth(null) < 0)) {
         // we could not load the image - probably invalid file format
         return null;
       }
       return new OFImage(image);
     }
     catch(IOException exc) {
       return null;
     }
   }
   /**
    * Write an image file to disk. The file format is JPG. In case of any problem
    * the method just silently returns.
    *
    * @param image The image to be saved.
    * @param file  The file to save to.
    */
   public static void saveImage(OFImage image, File file)
   {
     try {
       ImageIO.write(image, IMAGE_FORMAT, file);
     }
     catch(IOException exc) {
       return;
     }
   }
 }
Berikut ini adalah source code untuk Class OFImage:
/**
  * Write a description of class OFImage here.
  *
  * @author Isnaini Nurul KurniaSari/05111740000010
  * @version 1.0/26-11-2018
  * @class PBO-B
  */
 import java.awt.*;
 import java.awt.image.*;
 import javax.swing.*;
 public class OFImage extends BufferedImage
 {
   /**
    * Create an OFImage copied from a BufferedImage.
    * @param image The image to copy.
    */
   public OFImage(BufferedImage image)
   {
      super(image.getColorModel(), image.copyData(null),
         image.isAlphaPremultiplied(), null);
   }
   /**
    * Create an OFImage with specified size and unspecified content.
    * @param width The width of the image.
    * @param height The height of the image.
    */
   public OFImage(int width, int height)
   {
     super(width, height, TYPE_INT_RGB);
   }
   /**
    * Set a given pixel of this image to a specified color. The
    * color is represented as an (r,g,b) value.
    * @param x The x position of the pixel.
    * @param y The y position of the pixel.
    * @param col The color of the pixel.
    */
   public void setPixel(int x, int y, Color col)
   {
     int pixel = col.getRGB();
     setRGB(x, y, pixel);
   }
   /**
    * Get the color value at a specified pixel position.
    * @param x The x position of the pixel.
    * @param y The y position of the pixel.
    * @return The color of the pixel at the given position.
    */
   public Color getPixel(int x, int y)
   {
     int pixel = getRGB(x, y);
     return new Color(pixel);
   }
 }
Berikut ini adalah langkah-langkah untuk menjalankan aplikasi ImageViewer:

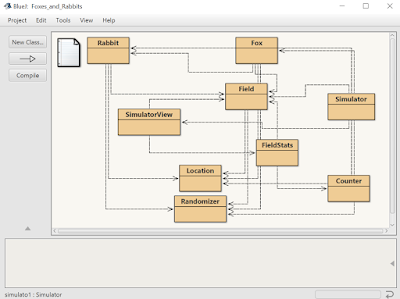
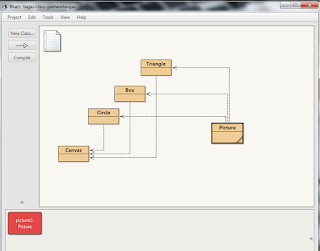
Gambar diagram class yang digunakan

Klik kanan pada class ImageViewer, kemudian klik new ImageViewer()

Menu bar pilih File kemudian, Klik Open

Pilih nama File yang ingin dibuka, kemudian Klik Open

Berikut adalah hasil gambar dari File yang kita buka
Sekian, semoga bermanfaat. Terima kasih teman-teman.

Comments
Post a Comment